External wall insulation is one of the most effective ways to improve the thermal performance of a solid-walled property — when it is correctly specified and installed. When it goes wrong, the problems can be difficult to diagnose, expensive to fix, and sometimes cause new issues that did not exist before the work was done. The important fact is that almost every EWI failure is traceable to a specific cause — wrong specification, inadequate preparation, poor workmanship at a known critical point — rather than a fundamental flaw in the technology. Understanding the failure modes helps you ask the right questions before appointing a contractor.
Why EWI problems are almost always installation failures
EWI systems have been installed successfully across Europe for decades. The technology is well understood, the materials are proven, and the installation process is precisely documented in manufacturer specifications. Problems do not arise from the concept. They arise when:
- The substrate is not properly assessed or prepared before installation begins. Active damp, defective masonry, or existing render that should have been stripped but was not — these create conditions in which EWI cannot perform as specified.
- The system is incorrectly specified. Wrong insulation thickness for the U-value target, wrong material for the building height or fire rating, products from different manufacturers mixed within the same build-up — each creates a different failure risk.
- Workmanship at critical junctions is poor. EWI systems have a small number of known critical points: the base of the system, window and door reveals, the eaves junction, and penetrations such as pipes and meter boxes. Shortcuts here are where most real-world failures originate.
- Work is carried out outside manufacturer weather conditions. Renders applied in frost, heavy rain or extreme heat cure incorrectly and have a reduced functional life.
For more on what a correct EWI installation involves, see our External Wall Insulation service page.
Water ingress behind the system
Water getting behind an EWI system is the most serious failure mode. Once moisture is trapped between the insulation and the original wall, it can cause boards to detach, damage the masonry behind, and create conditions for mould. It is also difficult to diagnose because the visible symptoms — internal damp patches, render cracking — can have several causes.
Water entry points in EWI systems are almost always at junctions, not through the render face:
- The base of the system. The starter track at the base must be correctly positioned above the damp proof course, with the base properly sealed. A missing or incorrectly positioned starter track is a common source of early damp problems.
- Window and door reveals. The junction between insulation boards and the window or door frame requires flexible sealant. An unsealed junction allows water to track along the reveal and behind the system.
- The eaves junction. Where the top of the EWI system meets the soffit or roofline, wind-driven rain can get behind the system if the junction is not properly sealed and protected.
- Penetrations. Pipes, cables and meter boxes need sealing around their perimeter. Any unsupported penetration through the system is a potential water entry point.
- Pre-existing active damp. EWI installed over a wall with unresolved rising damp or penetrating damp traps the moisture source inside the system. Damp internally will typically be worse after installation than before it.
A proper pre-installation survey assesses the existing wall condition, identifies any active damp and specifies remediation before EWI is applied. This step should not be skipped.
Thermal bridging and cold spots
One of EWI’s primary benefits over internal insulation is continuous wall coverage, eliminating the thermal bridges that form at floor joists and wall plates. However, EWI can introduce its own thermal bridges if not correctly detailed:
- Uninsulated window reveals. Where reveals are left without insulation, the reveal creates a direct thermal bridge between the cold external wall and the internal surface. This causes cold frames and cold reveals internally, and in serious cases, condensation and mould at the reveals. Even 30–50mm of reveal insulation significantly reduces this bridge.
- Mechanical fixings. Each plastic-capped fixing represents a minor thermal bridge through the insulation layer. In a properly specified system this penalty is included in the U-value calculation. Metallic fixings create much larger bridges and are not appropriate for EWI systems.
- Board gaps. Gaps between insulation boards, or areas where boards are not fully adhered, create localised cold spots. Boards must be installed in a staggered brick-bond pattern with joints tightly butted.
Thermal bridging problems often manifest as cold areas on internal walls, or condensation at specific points — reveals and corners — rather than across the insulated wall area uniformly.
Render cracking and detachment
Cracking in the render finish of an EWI system is one of the most visible failure indicators. The nature, location and extent of cracking determines its significance.
The main causes of render cracking in EWI:
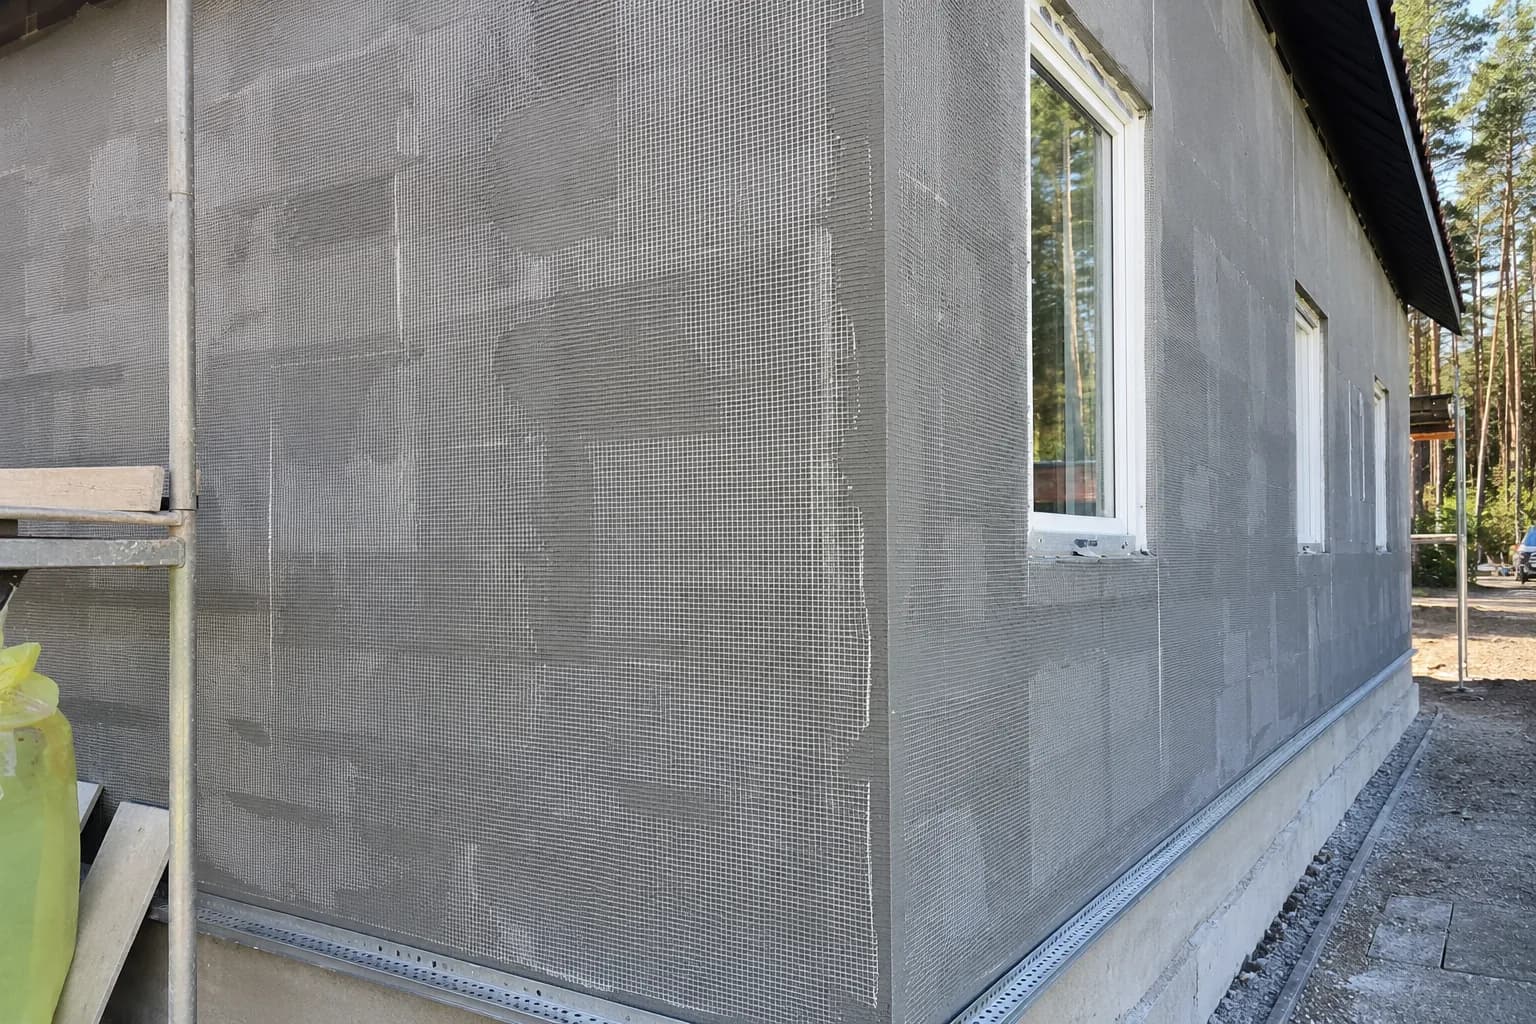
- Inadequate or lightweight reinforcing mesh. The alkali-resistant fibreglass mesh embedded in the basecoat prevents crack propagation under thermal movement. Mesh that is too lightweight, has insufficient coverage, or is not fully embedded will allow cracks to develop. The mesh specification — typically 160–180 g/m² or heavier at corners and openings — is not a place to economise.
- Insufficient corner reinforcement. Stress concentrates at corners of windows, doors and external wall corners. These areas require diagonal mesh patches or continuous corner mesh in addition to the main field mesh. Omitting this is a common source of diagonal cracking from the corners of openings.
- Inadequate curing time between coats.Each coat needs to cure to the manufacturer’s specification before the next is applied. Applying the finish coat before the basecoat has properly cured creates adhesion failure between the layers.
- Movement in the substrate. If the underlying wall or boards move after installation — through inadequate fixing or substrate instability — this movement transfers to the render face as cracking.
Fine hairline cracking that develops over years from thermal cycling is different from cracking that appears shortly after installation. The latter almost always indicates an installation defect.
Insulation board adhesion failures
Boards that are poorly adhered can move, create voids, and in the worst cases detach — taking the render face with them. Board adhesion failure is almost always caused by one or more of the following:
- Contaminated or unprepared substrate. Boards adhered to dusty, algae-covered or loose masonry will not achieve a sound bond. Any existing render that is hollow or loose must be removed before EWI is applied over it.
- Incorrect adhesive application. EWI adhesive should be applied in the correct pattern — perimeter bead with dabs across the board centre — to ensure the required coverage. Insufficient coverage reduces bond strength.
- Inadequate mechanical fixing. Adhesive alone is not sufficient. Mechanical fixings — typically 6–8 per board, more at the perimeter and base — provide the structural anchor against wind loading. Under-fixing is a risk that may not manifest immediately but causes failure over time in exposed locations.
- Incompatible products.EWI systems must use adhesive, primer, basecoat and finish coat from the same manufacturer’s specified system. Substituting products invalidates the warranty and can compromise adhesion between layers.
Window and door junction failures
If there is one single point that accounts for the majority of real-world EWI problems, it is the junction between the EWI system and window and door openings. This is where water ingress, thermal bridging and cracking most commonly originate — and where the difference between a carefully detailed installation and a rushed one is most evident.
Correct detailing at window and door openings requires:
- Reveal insulation. A layer of insulation board — typically 30–50mm — taken around the reveal of each opening. This reduces the thermal bridge at the reveal and prevents the cold corners that cause condensation internally.
- Corner bead at all junctions. Stainless steel or PVC angle bead reinforces the vulnerable corners at reveal edges and external wall corners, protecting against impact and providing a clean render termination.
- Flexible sealant between system and frame. A high-movement flexible sealant fills the gap between the EWI edge and the window or door frame, accommodating differential movement without cracking. This sealant is the primary water seal at this junction. It has a finite life — typically 10–15 years — and requires periodic replacement.
- Diagonal mesh at corners. Additional 45° mesh patches at every opening corner prevent the diagonal cracking that is common in inadequately reinforced reveals.
The time pressure on these details — they require patience to execute correctly around every opening in the building — is where quality differences between contractors most often appear.
How to protect yourself when commissioning EWI
Most EWI problems are preventable. These questions, asked before appointing a contractor, help identify whether the installer is approaching the work correctly:
- What is the full product specification? Ask for the brand and product name of every system component — adhesive, board, fixings, basecoat, mesh, primer and finish coat. All should be from the same manufacturer’s specified system. A contractor who cannot provide this is not specifying EWI professionally.
- What U-value will the installation achieve? Ask for a U-value calculation showing the existing wall, the insulation specification and the target. A professionally specified EWI installation will include this.
- What does the survey cover? A proper pre-installation survey should assess substrate condition, check for damp, confirm existing render is sound enough to build over, and identify any planning constraints.
- What warranty does the installation carry? Ask specifically about the workmanship warranty and any manufacturer-backed system warranty. Understand what conditions the warranty applies under and what it covers.
At Sprayplast, we work with homeowners across Yorkshire — from Leeds and Hull to Doncaster — and every EWI installation starts with a free technical survey, uses a complete manufacturer-specified system, and includes all the critical junction detailing described above. Contact us to arrange a survey.